Showing posts with label tutorial. Show all posts

Monday, May 11, 2020

Covid-inspired Creating Part 2

For this particular project it's been on my heart and mind to find a way to create something purposeful and when we get back stateside, I hope to contribute in some way using my gift of sewing if masks are something people need. Please know that I have never had formal training, nor do I claim to be a sewing expert. I fumble, bumble and try to figure out my projects along the way.

One thing to note, I rarely look at other craft blog tutorials (if I going to post something) because there is a part of me that feels like that is cheating (if I did, I would have proper citations, hah!) and another part of me wants to figure it out for myself. I have internalized The Stanford d.school's design thinking process, or elements of it, when tackling a project.

So with that, I worked through a few iterations or prototypes of fabric mask making. I'll share the process in hopes to inspire you... (If you want to know more about how or why this was inspired, read Covid-inspired Creating Part 1

Before you begin, you'll need a sewing machine, rectangle fabric scraps and elastic. You really can do this as a beginner. Give it a try!


TIP: use elastic headbands! I used to score these 5 for $1 at the Dollar Tree back in the states. 

Prototype 1: Reversible Ear Flap Strap Mask 


Cut out two rectangles of fabric. I wish I had measurements, but I don't. Sorry! 
I am guessing around a 6 by 8 inch rectangle. 

Now, this was the first attempt, so I WOULD NOT do it this way. The elastic ends should have been stretched out a bit more to the corners, but go with it. 


Pin the elastic (close to the corner) and place the other piece on top. 

You are making a sandwich with the elastic on the inside. 

Sew with a zig-zag stitch. 

Check that the elastic is secure between the two pieces of fabric.

Repeat pinning and sewing the elastic on the other side, then run the zig zag stitch all the way around. 


You should have a pocket. 


Sew the fourth edge, leaving about 1.5 inch opening. 


Flip it inside out. 


You should have a small opening left. 


Tuck in the fabric and pull it tight. 


Pin it and use a straight stitch to sew all four sides. 


Press and trim the stray thread. 


Comfy fit, but it was too loose and the elastic would have been better if sewn in on the corners. 


Prototype 2: The Headband Mask 


I often do not have enough bobbins for the thread colors I use. 

TIP: If you are not anal or OCD, your top thread and and bobbin thread DO NOT HAVE to match. Really, I promise. Just choose colors that match the color scheme and you'll be surprised at the tiny extra detail of color. 


This was a 15 by 8 inch rectangle. 

Remember fan folding? I tried that out to make pleats. Fan fold and press with a hot iron after each fold. Press the entire piece to solidify folds. 

Cut in half so you have two equally sized rectangles. 


Go ahead and straight stitch both ends, on both pieces, so the pleats stay in place. 


Prep your sandwich. This time lay the elastic straight from end to end close to the corners. 


Pin and sew. 

*This was too tight for me so don't trim off the extra, use it so yours fits better than mine. 

Follow the same steps above, sewing all the sides and flipping it inside out. 


Straight stitch the entire side to close the opening. 


This one took a minute to get into. 


Strap one, over the head to rest at the base...  


Then pull up strap two. 

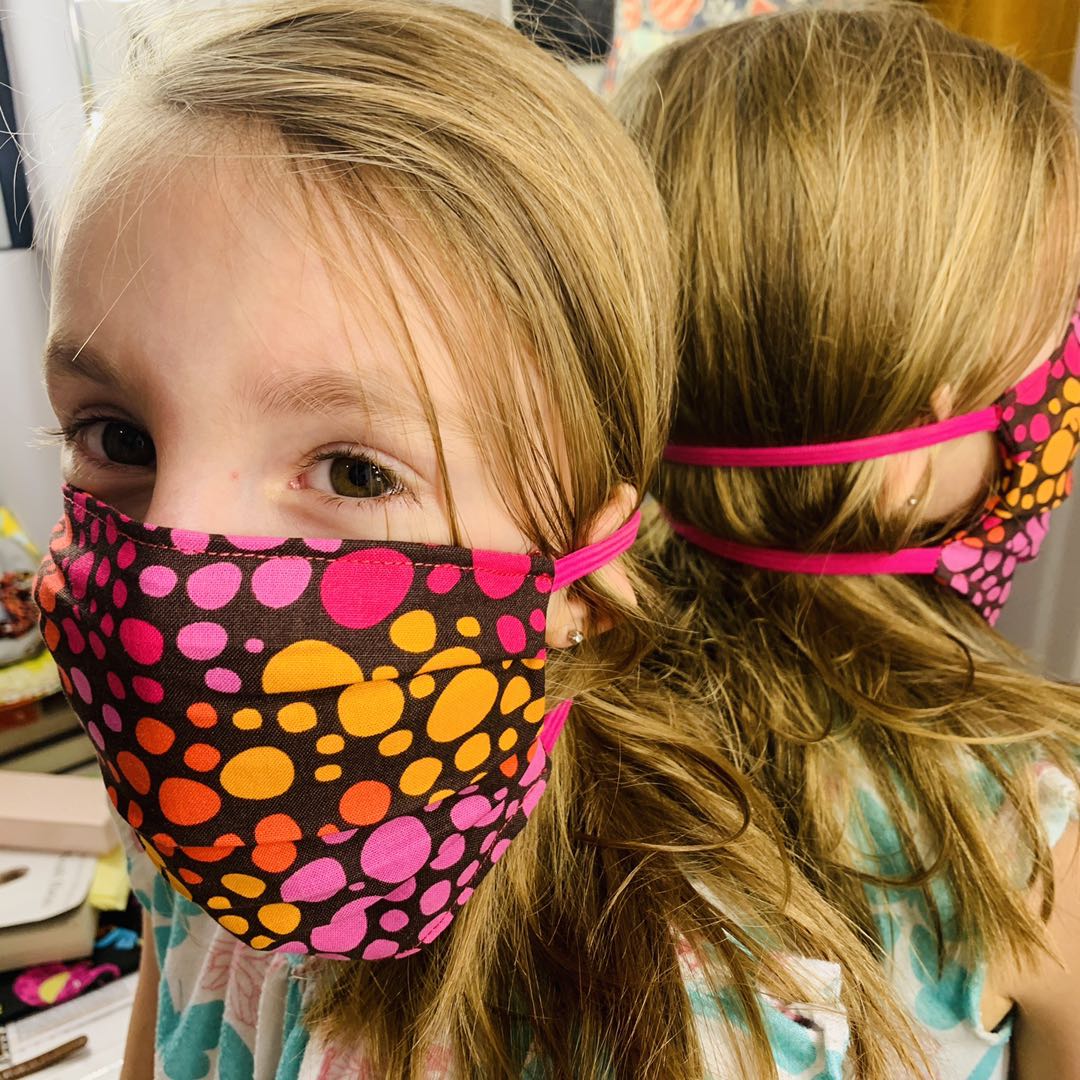
The elastic is also a little tight for Jovie, but it doubles well as a.... 


HEADBAND! 


This fits nicely. It just needs a little more room. 


 Stay safe, be inspired, go create something! 


Sunday, May 3, 2020

Yes Another Headband...


Okay, the inaugural post to welcome me back into the crafting blogger world had to be a headband tutorial... I will not apologize for this. I have and will probably always like headbands, even if I do not wear them as much as I did in my twenties.

Think NO Sew Scarf meets Handband Weaving (previous posts... from a long, long time ago) 

What started as a project to FINALLY cut up all those t-shirts sitting in a tub waiting to become a quilt... 

Quickly became an inspired opportunity to make an easy and super comfortable headband! 


We're rockin' it sweatband style! 

I'm a little rusty, but see if you can follow along. I would love to see what you create. 
You know you have old tees sitting around waiting to be renewed and upcycled! 

This is one of those projects that do not require fancy tools. I promise. They just make it go quicker. 

You can use any pair of sharp scissors and cut the bottom off a t-shirt. Cut straight across from armpit to armpit so you have a rectangle. 
Cut strings from seam to seam. Then cut the seams off. 
You'll end up with six strips. (or how every many you want)

Fun fact about t-shirt jersey:
it stretches and becomes a big soft and yarn-like when you give it a hard tug 

(hence the no need for tidy lines, once you pull it, it will roll into itself and edges will be hidden)


Pull on all six strips. 

Lay out as shown. 


Hopefully you can braid. If you can't, well... ask a friend to help you with this project (one who can braid). 

Imagine you are braiding... basically, the three strands on the right and the three strands on the left...


Then you cross the middle strands and keep going... I don't think you can mess this up. 

Gently tug, separate the strands as you go... do NOT pull too hard. 


You don't have to sew it at this point. You could tie it off with small rubber bands or maybe pin it. 

If you do have a sewing machine, just run through the ends. 
Overlap slightly and secure the ends together. 

With extra strips, you will wrap all that mess up. 


Tie off one end and leave some hanging out. You will tuck this into the wrapped part. Really there is not right or wrong way to do this. Play with it. You want the ends tied and tucked so it won't unravel. It also makes it sit nicely at the back of the head comfortably. 


And there you have it! 


Play around with colors... I guess you could chose to do a multi-colored one. That might look cool. (Do people still say cool?) 

I made a 5 strand one for Jovie because I didn't want it too wide on her small head. 


Here's that not so tiny baby now... 

I hope you enjoyed this tutorial! If you do get inspired let me know! It will keep me going. 

Happy Crafting 

Tuesday, August 30, 2011

Mr. Freeze Please

Once upon a time, a long summer ago, my friend over at Paper Wings (click on her button!) mentioned this wonderful thing called freezer paper.  Well one thing lead to another and I went freezer paper crazy. But like most things, it was only for a week. Then I was onto my next crafting endeavor. Well, I am here to show you some of the little lovelies that I made in the past and one that I have been promising to deliver on for quite awhile now!
 Let's talk tutorial first...

Here is what you need:
  • Freezer Paper
  • Tote (or other item you want to add your design on)
  • Fabric paint and sponge brush
  • Iron
  • Craft knife

Next, decide what design you want and print it from your computer.  I just used Google images for the paw print and typed the C.U.B.S.


Lay your feezer paper, shiny side down on the image and trace the image.

Use your craft knife to cut the image out. Of course, where ever you cut is where your paint will show up. For images like this one that seems pretty easy. However, if you check out my Audrey Hepburn tee or bicycle onsie, that was very tricky.

Iron on the freezer paper with a low setting to set the paper in place. 

 I mixed up some black and blue paint to get the navy color I wanted.  Paint on your fabric paint and let dry.


Carefully, peel your freezer paper off.

Sometimes, you'll have to use the craft knife to remove smaller pieces. 

Ta-dah!


Here are some of my other freezer paper creations...